Custom shirt logo design begins with a clear brand vision and a practical plan, because the right logo on a shirt can transform a simple garment into a moving billboard. From corporate uniforms to team merch, a well-conceived logo enhances cohesion, communicates quality, and supports t-shirt branding efforts across channels, from digital storefronts to live events. The guide that follows outlines a step-by-step process that helps ensure consistent appearance, production efficiency, and long-term impact, while addressing essential topics such as logo placement on shirts and logo sizing for apparel. By evaluating production methods like embroidery vs screen printing logos and testing colorways on multiple fabric colors, you can choose a path that balances durability, cost, and visual clarity. Whether you’re outfitting a small business, a sports club, or a merchandise line, a scalable design system will keep your branding legible and compelling at every size, from sleeve patches to full-back banners.
Beyond the phrase Custom shirt logo design, the same idea appears in garment branding and apparel identity, where a well-crafted emblem on tees communicates your story before a customer reads a single word. Think of the logo as a signature mark that travels from polo shirts to hoodies, ensuring consistent logo placement on shirts and maintaining legibility across sizes and fabrics. In practice, designers often discuss print methods—embroidery, screen printing, and heat transfer—as different textures and lifespans, so you can weigh durability against price and turnaround time. Other keywords come into play as you map out how the brand appears on merchandise: emblem size, color fidelity, and the balance between a bold mark and a subtle cue within your t-shirt branding strategy. From a search optimization perspective, using related terms such as garment branding, logo sizing for apparel, and method-specific considerations helps search engines connect your guide to real user questions about clothing logo design. As you prototype, test across fabric swatches, and solicit stakeholder feedback, you’ll build a flexible system that scales with inventory—from caps and jackets to large campaigns. The goal is a cohesive visual language that stays legible when scaled down for lapel pins or sleeve badges and remains impactful on banners and merchandise displays.
Custom shirt logo design: Clarifying Branding Goals for Consistent Identity
Clear branding goals anchor your custom shirt logo design and keep decisions aligned with the broader brand strategy. Define the target audience, the brand tone, and the messages you want the shirt to convey. Document color preferences, typography style, and any symbols or initials so every design choice supports a cohesive identity across apparel and other marketing channels. This foundation also helps shape your approach to t-shirt branding and ensures the logo translates well onto polo shirts, hoodies, and merchandise.
With stakeholders involved early, you reduce revisions and design drift. Establish a design language that fits existing brand guidelines and leaves room for scalable applications across products, from sleeves to banners. By thinking about logo placement on shirts and how the mark scales, you set up a flexible system that remains effective whether you’re outfitting a small team or launching a full merchandise line.
Choosing Production Methods: Embroidery, Screen Printing, or Heat Transfer
Decide on the production method early because embroidery, screen printing, and heat transfer each deliver a distinct look, feel, and durability. Embroidery creates texture and longevity, but fine detail can be limited at small sizes. Screen printing offers bold color and efficiency for large runs, while heat transfer and vinyl provide flexibility for complex multi-color artwork and smaller batches. Understanding embroidery vs screen printing logos helps weigh texture, color fidelity, and budget.
Consider fabric color, garment type, and expected wear when choosing a method. The right choice preserves legibility and brand feel across light and dark fabrics, while fitting your budget and production timeline. Testing proofs and color swatches ensures alignment with Pantone references and keeps your branding consistent across products.
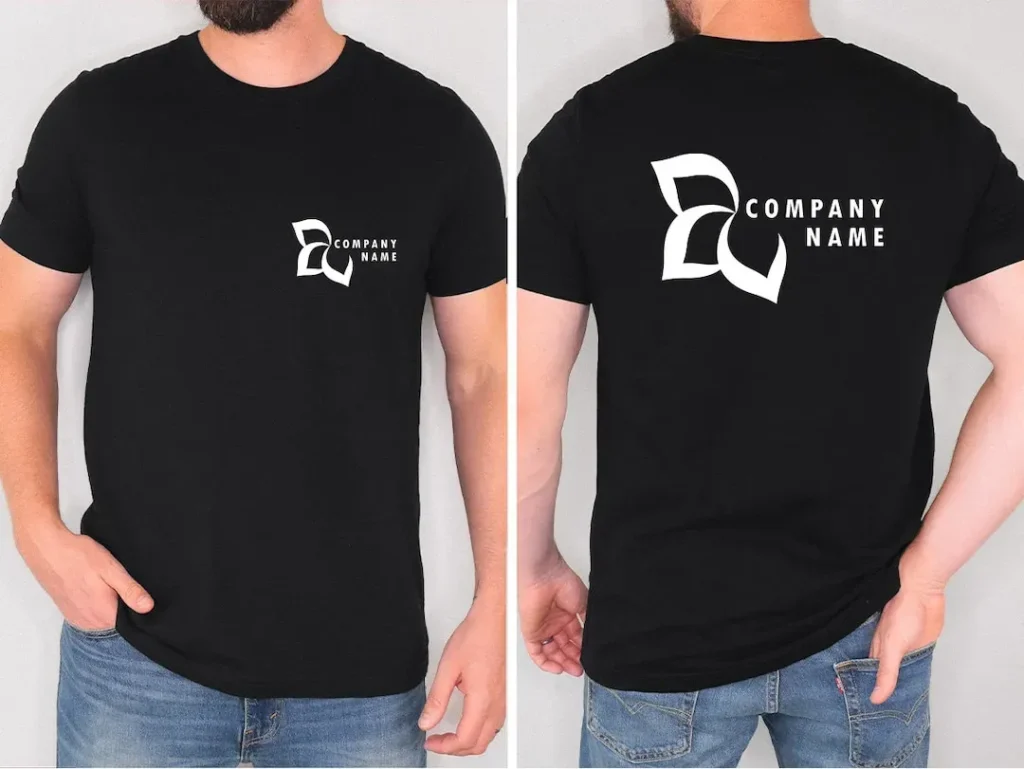
Logo Placement on Shirts: Strategic Positioning for Maximum Impact
Where you place the logo affects visibility and identity. Typical options include left chest for a clean, professional impression, full chest for maximum brand presence, back center for event branding, and sleeves for accents. Each placement serves different brand scenarios—from corporate uniforms to merchandise lines—and should be chosen with long-term scalability in mind.
Test placements on mockups across garment colors and sizes. Ensure the placement aligns with your design system and supports future expansion into additional apparel categories. Regularly review how placement interacts with fabric weight, print method, and color contrast to maintain legibility on every shirt.
Determining Logo Size: How to Scale for Every Garment
Logo sizing for apparel should balance legibility with aesthetics. A common guideline is that the widest element of the logo on a left-chest placement sits between 2 and 4 inches (5–10 cm), with larger sizes reserved for back or center front placements. Consider variations for women’s cuts or children’s apparel to keep proportions clean and readable across all audiences.
Prepare multiple size options for testing on real garments and consider how size interacts with different fabrics and color contrasts. Collect feedback from stakeholders to finalize a scalable sizing framework that works across polo shirts, hoodies, and performance wear, ensuring consistent brand impact.
Designing for Scalable Artwork: From Concept to Vector Files
Create or adapt artwork in vector format to ensure clean lines at any size. Use AI, EPS, or SVG files so logos scale without pixelation on everything from sleeve patches to full-back prints. Designing with scalability in mind supports a cohesive look across the product line and strengthens t-shirt branding across various apparel categories.
Preserve core elements—symbol, wordmark, and color hierarchy—and simplify details for small print methods like embroidery or heat transfer. Test color accuracy and ensure your palette works across light and dark shirts, keeping the brand’s visual identity intact on every garment.
Prototype, Feedback, and Quality: Ensuring Perfection Before Production
Run small prototypes to evaluate print quality, color fidelity, and garment fit. Prototyping helps you verify logo readability on various fabrics and colors before a full run, reducing the risk of costly mistakes and misaligned branding.
Gather feedback from internal teams and end users, iterate on placement and size, and document final production specs. Establish quality standards and a design system that can adapt to future product lines while maintaining brand consistency across all shirts and related apparel.
Frequently Asked Questions
In Custom shirt logo design, how does logo placement on shirts affect brand recognition, and what placements are most effective?
Logo placement on shirts impacts readability and visibility at typical viewing distances. Common placements include the left chest for a subtle, professional look; the full chest or center back for high visibility; and sleeve accents for brand differentiation. Test these placements on multiple fabric colors to ensure legibility and impact across contexts.
How do I decide between embroidery vs screen printing logos in a Custom shirt logo design project?
Embroidery adds texture and durability, and works well on polos and jackets but can be pricier and lose fine detail at small sizes. Screen printing is cost-effective for bold, multi-color logos and large runs, especially on light fabrics, though it may require underbases on dark shirts. Evaluate logo complexity, color count, fabric color, and budget, and request proofs before production.
What guidelines apply to logo sizing for apparel in a Custom shirt logo design to maintain readability across sizes?
Keep the logo proportional to the garment. A common guideline is 2–4 inches (5–10 cm) in width for the widest element on the left chest, with larger sizes for back or full-front placements. Limit the color palette to 2–4 colors for most print methods and test on actual garments. Use vector artwork to ensure clean scaling from small to large formats.
What should you consider for t-shirt branding when planning a Custom shirt logo design?
Clarify your brand voice and ensure the design remains legible and on-brand across colors and fabrics. Favor simplicity and strong contrast, align with existing guidelines, and create mockups to visualize outcomes on different shirt styles to support consistent t-shirt branding.
How should I test logo placement on shirts during the Custom shirt logo design process?
Create mockups on multiple shirt colors and sizes, view from various distances, and gather stakeholder feedback. Use these insights to refine placement and size, and develop a scalable design system for future products and variations.
Which production method—embroidery, screen printing, or heat transfer—best supports a Custom shirt logo design goal, and why?
Choose based on durability, color complexity, and budget. Embroidery offers texture and long wear for durable logos, screen printing suits bold multi-color designs and large runs, and heat transfer provides flexibility for small runs or detailed artwork. Always review proofs and consider fabric type and wash expectations to determine the best method.
| Topic | Key Points |
|---|---|
| Introduction | Branding through apparel; a step by step approach to custom shirt logo design; logos on shirts unify teams and act as moving billboards; ensures consistency, quality and impact across products. |
| Before you begin (Key considerations) | Define target audience and brand tone; ensure legibility across fabric colors; design system that works across products and channels. |
| Step 1: Clarify branding goals | Identify what the logo communicates about quality, reliability and personality; define audience and how shirts will be used; document color preferences, typography and symbols; align with brand guidelines; involve stakeholders. |
| Step 2: Gather design assets and constraints | Collect existing logos and vector files; note color limitations and production constraints; test contrast across colorways; decide which elements must stay; use rough sketches or mood boards. |
| Step 3: Choose production methods | Embroidery advantages and limits; Screen printing best for bold logos and large runs; Heat transfer is flexible for small runs and many colors; balance with logo complexity, colors, garment color, budget and durability. |
| Step 4: Determine logo size and placement | Common placements include left chest, full chest, back center and sleeve; left chest 2 4 inches wide; larger for back; test on swatches; ensure legibility at distance. |
| Step 5: Create or adapt scalable artwork | Use vector; preserve symbol and wordmark; aim for simplicity and strong contrast; limit palette to 2 4 colors; test legibility; create mockups for different shirt colors. |
| Step 6: Review production and quality standards | Provide precise specs to printers; confirm garment sizes and fabrics; request proofs and color swatches; consider sustainability and ethics; communicate commitments in branding. |
| Step 7: Prototype, feedback and final production | Create small batches; collect feedback on print quality, readability, color accuracy and comfort; iterate as needed; build scalable design guidelines for future updates. |
| Practical tips | Maintain consistency; document decisions; test across fabrics; plan for scalability; budget wisely; plan for future product lines and co branding. |
Summary
Custom shirt logo design is a powerful way to express your brand across clothing and accessories. A deliberate, descriptive approach ties branding goals to asset preparation, method selection, placement, scalable artwork and quality checks, resulting in shirts that look professional, feel comfortable, and reinforce your brand identity. By prioritizing logo placement on shirts and optimizing for logo sizing across apparel, you can balance durability with budget while choosing embroidery or screen printing. With careful planning, testing, and a scalable design system, your custom shirts become a reliable channel for brand visibility and customer engagement.