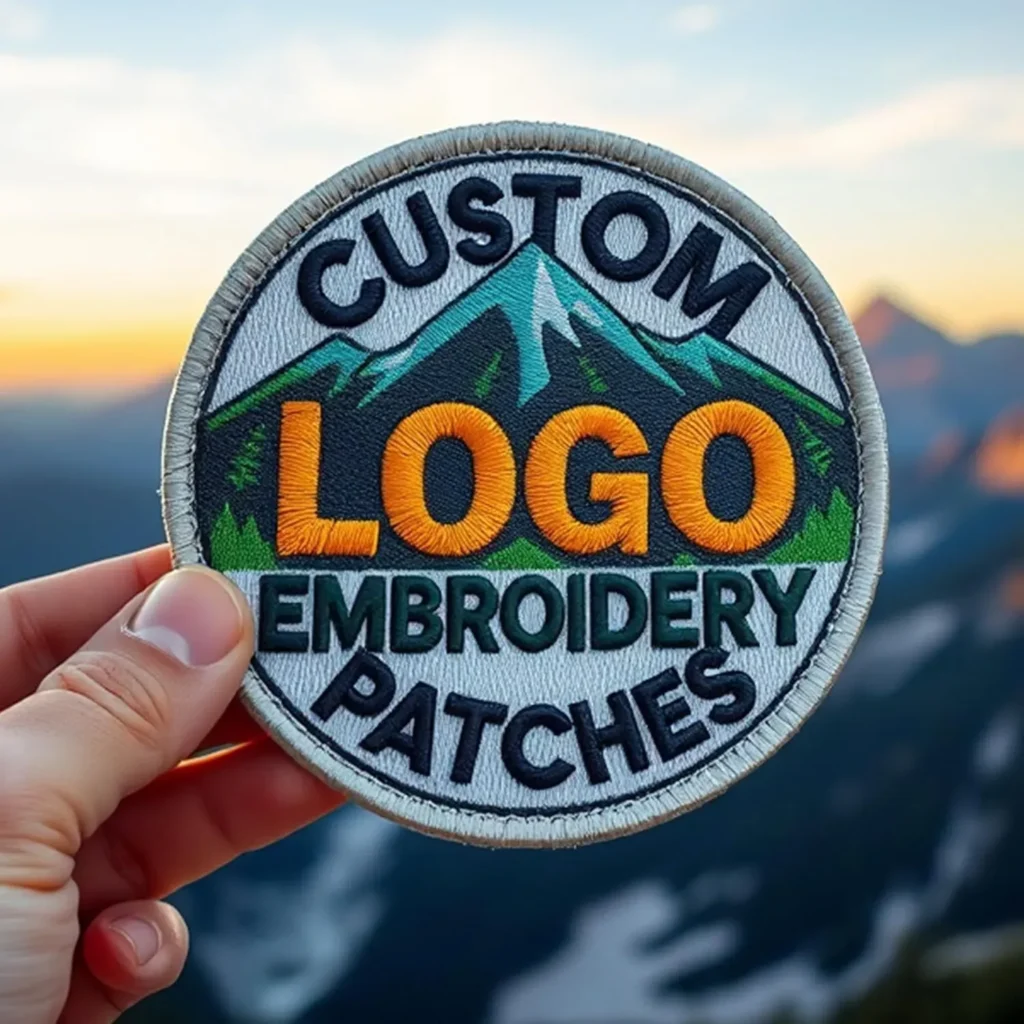
Design Your Own Embroidered Patches is more than a craft project; it is a creative journey that carries a concept from sketch to stitch. This guide blends design thinking with practical techniques to help you plan patches that tell a fabric story. If you are brainstorming, consider embroidered patches design ideas that align with your brand or personal style. From selecting fabrics to digitizing art, the process emphasizes bold silhouettes, color relationships, and legibility at small patch sizes. By the end, you will translate concept into stitches and prepare files for home machines or professional services, ready to sew onto garments or accessories.
For a broader view, think of these fabric badges as personalized insignias, fashion statements, or brand marks that live on jackets, backpacks, and hats. If you explore embroidery projects, you are encountering the same design workflow behind patch design ideas and tips, from initial sketch to final stitch. Finally, consider the practical path of custom patches process from concept to stitch as a roadmap for efficiency, production choice, and consistency.
Defining the Patch Goal and Audience
Before you begin designing patches, clearly define the goal and the intended audience. Is the patch a personal emblem, a fashion statement, or a logo for merch? Knowing who will wear it and on which fabrics guides decisions about size, shape, color palette, and level of detail. This clarity keeps the project rooted in purpose as you move from concept to stitch.
Translate that goal into practical constraints: ensure legibility at patch size, consider how it will be sewn or ironed onto garments, and think about durability through washing. By front-loading these considerations, you maintain a clear path from idea to stitchable art that resonates with your audience and fits your brand identity.
Design Your Own Embroidered Patches: A Step-by-Step Workflow for Beginners
Starting with a strong concept, sketch ideas on paper or digitally, focusing on bold silhouettes and simple shapes like semi-circular badges, shields, or rounded emblems. Patches read from a distance, so avoid fine details that vanish when scaled. This step seeds the design with immediacy and helps you explore ‘design your own embroidered patches’ ideas that translate well to stitch.
Next, translate sketches into color blocks and plan a small, coherent palette. Limit the number of colors and ensure each colorway remains instantly recognizable. If you’re aligning with an existing brand, keep the core design consistent while adjusting colors for variety. Then prepare digitized files with clear stitch instructions to support a smooth custom patches process from concept to stitch.
Embroidered Patches Design Ideas: Shapes, Themes, and Brand Alignment
Explore a variety of shapes and motifs that suit the patch’s message, from badges and crests to circular icons and geometric outlines. Use the term ’embroidered patches design ideas’ to guide brainstorming while testing how shapes read when stitched on fabric, ensuring the silhouette holds up at different sizes.
Consider theme consistency—fashion, sports, hobbies, or branding—and align color schemes with existing identity elements. A cohesive set maintains recognizability across patches, so your designs feel part of a deliberate collection rather than random graphics.
DIY Embroidered Patches: Tools, Materials, and File Prep
Choose sturdy base fabrics such as twill, felt, or canvas and pair them with appropriate stabilizers to support stitches inside the patch. A heat-seal backing offers convenient iron-on attachment, while traditional fabric backings suit sew-on styles. Using quality threads—polyester for durability or rayon for sheen—also influences the patch’s finished look for DIY embroidered patches.
Digitizing or vectorizing your artwork turns art into stitch instructions. If you’re new, look for beginner-friendly software or services with auto-digitizing options. Your file should specify stitch types, underlay, color changes, and any lettering direction, because a clean, well-prepared file makes the actual stitching faster and more forgiving for home machines.
Patch Design Ideas and Tips: Color, Detail, and Legibility
Keep color palettes intentionally small and high-contrast to ensure readability on diverse fabrics. Test colors on similar swatches and consider how threads read under different lighting and textures. Choose stitch types—satin for bold outlines, fill stitches for large areas, and occasional running or backstitches for fine lines—with attention to how they behave on the chosen fabric.
Mind edge finishes and durability: merrowed edges or dense zigzag edges can prevent fraying and give a professional look. When designing, avoid excessive fine detail on tiny patches, and ensure lettering is legible when scaled down. This is where ‘patch design ideas and tips’ converge with practical constraints to deliver patch art that sells and lasts.
Custom Patches Process from Concept to Stitch: Prototyping, Production, and Care
Prototype early and test stitches for density, color balance, and edge finish. Create multiple sizes and fabric tests to reveal how the patch performs under real use, then adjust stitch count, color count, or silhouette as needed. Whether you DIY or outsource, iterative prototyping keeps the final product consistent and reliable.
Scale up with a production plan, choosing backing, attachment methods, and finishing options like merrowed edges. If you work with a manufacturer, understand minimums, lead times, and licensing needs. Finally, add care instructions for wearers, so patches remain vibrant through washing, and organize files and documentation to support future reproductions of the same design.
Frequently Asked Questions
What is the first step in design your own embroidered patches?
Define the patch’s goal and audience to influence size, shape, and color. Sketch bold silhouettes and choose a practical badge shape. Translate your concept into a simple, stitch-ready layout to guide the rest of the process.
What embroidered patches design ideas help patches stay legible at small sizes?
Focus on bold shapes and strong contrast. Limit the color palette to a few core colors, avoid fine internal details, and test the design on scraps of the intended fabric. Keep the core motif consistent across colorways for brand recognition.
What is the DIY embroidered patches workflow from concept to stitch?
Prepare fabric and stabilizers, then digitize or vectorize the design and determine stitch types and color changes. Hoop the fabric, stitch the patch, and finish with an edge (merrowed or zigzag). Do a test patch to refine density and appearance.
Which patch design ideas and tips optimize color, texture, and edge finishing?
Use satin stitches for outlines, fill stitches for larger areas, and keep texture balanced. Choose thread types (polyester for durability, or rayon for sheen) and select a durable edge finish. Test under laundering to ensure color and texture hold.
How do I decide between DIY embroidered patches and outsourcing for a run, considering the custom patches process from concept to stitch?
DIY is flexible for small quantities and rapid prototyping, while outsourcing can lower per-unit costs for larger runs and offer finishes like merrowed edges. Consider quantity, budget, timeline, and minimums; simplify designs to fit production constraints; organize files for reuse.
What care and finishing practices help patches last, applicable to design your own embroidered patches?
Provide clear care instructions (gentle washing, air-drying). If using heat-seal backs, use a protective sheet when ironing. Choose robust edges and backing, and store design files securely to support future reorders.
| Topic | Key Point | Notes |
|---|---|---|
| Understanding goal and audience | Define the goal of each patch (personal emblem, fashion statement, or logo); identify who will wear it and what fabrics it appears on; decide size, shape, color palette, and level of detail to ensure legibility. | Shapes, size, and detail depend on end use; align with intended wearer and fabric constraints. |
| From concept to sketch: the design mindset | Start with a strong concept; sketch ideas; patches read from a distance; avoid overly fine details; consider shapes like semi circular, shield, or rounded badge. | Keep silhouettes bold and scalable for readability. |
| Color planning | Translate designs into color blocks; limit the palette; keep core design consistent across color variants; align with branding if applicable; test color options on fabric since thread reads differently. | Test colors on similar fabric to ensure readability and contrast. |
| DIY embroidered patches: materials and file prep | Use sturdy patch materials (twill, felt, canvas); stabilize with cutaway or tear-away; digitize design to specify stitches, underlay, lettering direction, and color changes; keep designs simple for smoother embroidery. | Clear digitizing instructions aid machine compatibility. |
| Stitch types and techniques | Satin for outlines/fills; fill stitches for larger areas; running stitches for light lines; backstitches for lettering; avoid very fine satin on small patches; combine satin edges with bold fills on larger patches. | Balance density and legibility to prevent fraying or distortion. |
| Choosing the right thread and backing | Polyester threads are versatile and colorfast; rayon adds sheen but may wear; consider UV-resistant and colorfast threads for outdoor use; choose backing (heat-seal or fabric) and edge finish (dense zigzag or merrowed edge). | Backing and thread choices impact durability and final look. |
| Backings and finishing options after embroidery | Heat-seal backing for iron-on patches; fabric backing with finished edge for sewing; apply edge finishes for durability. | Finish quality affects wear and attachment; choose method based on final application. |
| Prototyping and testing patches: iterate before production | Produce test patches to evaluate stitching density, color balance, and edge finish; adjust stitch count or colors if crowded; perform wash/wear tests; create prototypes in different sizes/fabrics to find best combo. | Iterate before committing to full production. |
| Scale and production options: DIY versus outsource | DIY at home is flexible for one-offs or small runs; outsourcing can lower costs for larger quantities and offer finishes like merrowed edges; simpler designs often have lower minimums; organize files for reuse; consider licensing. | Choose based on quantity, budget, and desired finishes. |
| Care and maintenance of patches | Provide care instructions: gentle washing, air-drying; iron-on patches may need a protective sheet; avoid fraying by proper edge finishing; include care notes in packaging or product pages. | Proper care extends patch life and customer satisfaction. |
| Creative ideas for patch themes and combinations | Mix bold typography with icons for fashion; craft distinctive branding shapes; explore hobbies, sports, travel, or nature; design collections that tell a story. | Develop cohesive collections that invite mix-and-match and storytelling. |
| Common pitfalls and troubleshooting tips | If detail is lost at small sizes, simplify design or increase contrast; test color separation to avoid bleeding; ensure fabric is taut to prevent misalignment; keep backups and log machine settings. | Proactive testing reduces errors in production. |
| A practical approach to getting started | Start with a simple badge and single motif; use a small color palette; test on scrap fabric; once satisfied, scale to final patch size; document color codes and stitch counts for consistency. | Documentation supports reproducibility and quality. |
| Roadmap for successful patch projects | 1) Define purpose and audience; 2) Sketch concepts and select color palette; 3) Digitize and plan stitches; 4) Produce prototypes and test; 5) Choose backing/edge/attachment; 6) Decide on DIY vs outsource; 7) Prepare care and marketing materials. | A structured plan helps steady progress from idea to finished patch. |
Summary
Conclusion: Design Your Own Embroidered Patches summary and guidance.