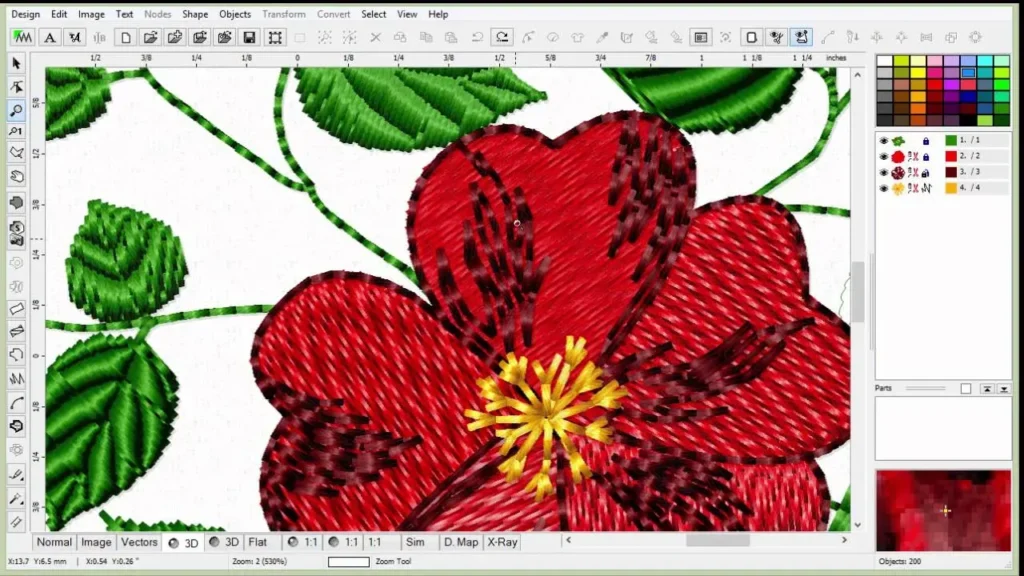
Digitizing for Embroidered Design is the bridge between imagination and a finished stitchout, turning ideas into precise machine instructions that guide embroidery machines to recreate texture, color, and depth while accounting for fabric behavior, hooping tolerance, and thread characteristics. In practice, professionals balance art and algorithm within the embroidery design process and the broader field of embroidery digitizing, leveraging standardized workflows, quality checks, and collaborative feedback to ensure consistent results across production runs. The field relies on digitizing software for embroidery that offers tracing tools, automatic underlay generation, stitch libraries, density controls, color management features, and export options compatible with a range of embroidery machines. A common goal is to convert artwork to stitches that sew cleanly on the chosen fabric, minimizing puckering, avoiding overly dense fills, preserving legibility in small type, and ensuring color stops align with production constraints, across different fabrics and hoop sizes. Whether for logos, decorative motifs, or complex garment prints, mastering this discipline sets the stage for professional results, repeatable performance, and scalable machine embroidery across multiple garments and fabrics while allowing scalable customization for volume work.
Viewed through an alternative lens, this practice becomes digital stitch planning that translates art into actionable embroidery paths, a form of garment decoration strategy that informs workflow across design, sample, and production stages. From a semantic perspective, terms like embroidery digitizing, converting artwork to stitches, and the embroidery design process point to the same goal: turning two-dimensional ideas into stitch sequences that machine embroidery can execute. By focusing on stitching logic, density management, and underlay planning, technicians align creative intent with manufacturing realities, easing collaboration between designers, technicians, and operators. Additionally, designers explore software tools for embroidery to support efficient workflow, from trace and color separation to stitch optimization.
Digitizing for Embroidered Design: Bridging Art and Stitch for Machine Embroidery
Digitizing for Embroidered Design connects creative concepts to precise machine instructions. In the embroidery design process, digitizing translates artwork into stitches that respect fabric behavior, thread characteristics, and the capabilities of machine embroidery equipment. This phase is not just a technical step; it sets consistency, quality, and repeatable results across production runs.
Effective embroidery digitizing relies on the right tools, including digitizing software for embroidery, accurate stitch libraries, and careful planning of underlay and density. By aligning the artwork with fabric and hoop constraints, designers ensure the final sew-out achieves the intended textures, colors, and depth.
Mastering the Embroidery Design Process: From Artwork to Sew-Out
The embroidery design process begins with a clear concept, often built from vector art or high-quality bitmap references. During artwork assessment, designers decide what will embroider well and what needs simplification, setting the stage for a clean sew-out on machine embroidery.
Next comes preparation and cleanup, where gradients are minimized and scalable references are ensured. This phase is followed by digitizing with intent, planning stitches, densities, and color stops to maximize coverage while preserving legibility and design intent across fabrics.
Choosing the Right Digitizing Software for Embroidery
Choosing digitizing software for embroidery depends on workflow, team collaboration, and the complexity of designs. Modern digitizing software for embroidery offers tracing tools, automatic underlay generation, stitch type libraries, density controls, and color management features that speed production and improve accuracy. These tools are essential for embroidery digitizing and machine embroidery workflows.
Important considerations include file formats (DST, EXP, PES), compatibility with your embroidery machines, and the ability to share projects across departments. The right tool helps maintain a consistent embroidery design process and supports efficient conversion of artwork to stitches.
Convert Artwork to Stitches: Practical Tips for Clean Stitch Output
Converting artwork to stitches starts with high-quality input files and ends with a stitch file the machine can read. Key decisions include scaling to fit the embroidery area, managing detail, and planning color to match production needs while preserving the visual intent.
Practical tips focus on stitch balance, grouping colors for efficient thread changes, and using appropriate stitch types for different textures. Early sew-outs help catch puckering or distortion, allowing rapid refinements before large-scale production.
Understanding Embroidery Digitizing: Stitch Types, Density, and Underlay
Understanding embroidery digitizing involves selecting stitch types such as satin for outlines, fills for large areas, and running stitches for decorative details. Managing density and pull compensation helps prevent fabric distortion and needle deflection during machine embroidery.
Underlay stitches provide stability before fills, improving edge quality and reducing puckering. Color management and design hierarchy also matter, with careful grouping of similar colors to minimize thread changes while preserving the original artwork’s intent.
Quality Control and Iteration: Achieving Consistent Machine Embroidery Results
Quality control is essential in embroidery digitizing. Prototyping on representative fabric, observing stitch behavior, and adjusting density, underlay, and pull compensation ensure that the final sew-out matches production expectations.
A repeatable workflow, documented settings, and regular sew-out tests drive consistency across machines and operators. This iterative approach to embroidery digitizing ties back to the embroidery design process and helps deliver reliable, high-quality results for every run.
Frequently Asked Questions
What is Digitizing for Embroidered Design and how does it relate to the embroidery design process?
Digitizing for Embroidered Design is the process of turning artwork into stitch instructions that an embroidery machine can read. It sits at the heart of the embroidery design process, shaping stitch types, density, underlay, color management, and fabric behavior to reproduce the original concept. Done well, it yields consistent, high quality sew-outs across fabrics and machines.
What are the key steps in the embroidery design process when performing Digitizing for Embroidered Design?
Core steps include assessing the artwork, cleaning up the file, and digitizing with intent to define stitch types and color stops. The workflow also covers converting artwork to stitches, placing underlay, and testing with a sew-out on production-like fabric, followed by refinements and finalization for production.
How does digitizing software for embroidery influence Digitizing for Embroidered Design and the convert artwork to stitches workflow?
Digitizing software for embroidery provides stitch libraries (satin, fill, run), underlay generation, density controls, and color management that translate artwork into stitches. It also handles file formats compatible with machine embroidery, enabling repeatable results and efficient collaboration.
What strategies help convert artwork to stitches during Digitizing for Embroidered Design to keep text legible and logos strong?
Strategies include scaling the design to fit the embroidery area, simplifying very fine lines, using bold outlines for legibility, mindful color planning to match thread availability, and balancing stitch density with fabric stretch. Always run test sew-outs to verify performance.
Why are test sew-outs critical in Digitizing for Embroidered Design and the embroidery design process for machine embroidery?
Test sew-outs validate that the digital plan translates into a reliable stitch-out on actual fabric and hooping conditions. They help identify issues like puckering or thread breaks, guide adjustments to density, underlay, and pull compensation, and ensure consistent results across production runs.
How should I select the right tools and establish a workflow for machine embroidery digitizing to support Digitizing for Embroidered Design?
Choose a capable embroidery digitizing software and compatible hardware (graphics tablet and embroidery machine) that fit your design style and team workflow. Establish a repeatable process—from artwork cleanup and digitizing to color management, testing, and final export—and document settings for different fabrics to ensure consistent machine embroidery results.
| Topic | Key Points |
|---|---|
| Definition and Purpose |
|
| Core Concept |
|
| Practical Overview – Steps |
|
| Tools of the Trade |
|
| Converting Artwork to Stitches |
|
| Stitch Types and Design Considerations |
|
| Quality Control: Test Sew-Outs and Iterative Refinement |
|
| Practical Pipeline: Concept to Stitch |
|
| Best Practices for High-Quality Embroidery Digitizing |
|
| From Concept to Stitch: The Bottom Line |
|
Summary
Digitizing for Embroidered Design is the bridge between imagination and a finished stitchout, turning artwork into precise machine instructions that guide embroidery processes toward faithful texture, color, and depth. This descriptive overview highlights the embroidery design process, essential tools, workflow, and quality-control practices that ensure repeatable, high-quality results across fabrics and production runs. By embracing careful planning, testing, and cross-team collaboration, Digitizing for Embroidered Design elevates every embroidered piece for brands, apparel, and textile applications.